Wednesday, December 14, 2016

How to Create a Kids Chore Routine and Allowance System


Hi everyone I wanted to give some ideas today on "How to Create a Kids Chore Routine and Allowance System" in your home. Below you will see photos of a chore chart and chore cards that I created in my home. Also below is a video on how I set up our chore routine in our home.


Chore Chart


Daily Chore Cards


Here is my YouTube video on "How to Create a Kids Chore Routine and Allowance System".
Hope you Enjoy it!!

XOXO
RIA

Sunday, December 11, 2016

Kitchen Decor Idea with Dollar Tree Items


Hi everyone I wanted to share with you guys a Kitchen Decor Idea with Dollar Tree Items that I created in my kitchen.


All the items in this Decor Idea are from the Dollar Tree.

To see how I created this Dollar Tree Kitchen Decor Idea check out my youtube video below:


I hope you enjoyed this post and I hope I gave you some ideas on how to create some Kitchen Decor of your own.

XOXO
RIA

Thursday, December 8, 2016

How I created a Family Command Center to keep my Home and Family ORGANIZED


Hi everyone I know I haven't posted any new things in my blog for awhile but that is because me and my family have moved and bought a new house and that is stressful in itself. Plus I had so many projects to do in this new house that has kept me busy. One of these projects is what I wanted to share with you today and that is our FAMILY COMMAND CENTER. I have wanted to make a command center in my home for awhile now and I finally decide what me and my family needed in a command center  and create one. So this is how I created a FAMILY COMMAND CENTER in my home. I have to apologies in advance for the pictures below some might be blurry because my camera was not acting right that day.


Here is an overview of our FAMILY COMMAND CENTER. It is set up on a wall in my entryway so that me and my family can see it when we come and go from the home. The color theme in my living room and kitchen are grey and white with bright accent colors of blues and yellows so I wanted my FAMILY COMMAND CENTER to be blues and yellows to go with my color themes. Having a FAMILY COMMAND CENTER in the home really helps to keep things organize and also have the members in the family work as a team to run the home.


At the top of my FAMILY COMMAND CENTER I have our family name in blue and yellow. I got the letters and the family sign at Walmart and just used some craft paint from Walmart to paint them to go with my color theme.  I wanted the family sign to look different so I put it slanted on purpose to look different from the Daniels letters.

The main part of my FAMILY COMMAND CENTER is the calendar itself. I wanted a BIG dry erase board so I got the biggest one I could find at Walmart. I wanted a big one because for one it makes what is on the calendar itself easier to read and also because it makes it easier to write on with the dry erase markers. The calendar did not come with the month titles or the calendar day numbers so I created my own in Microsoft Word and printed them out on blue paper, laminated them, and attached magnets to them. Since every year the months will be the same and also the number of the days, I wanted something that was already created so I can just switch them out every month instead of writing the same thing over and over again. I also like that the number days are different from the writing of events on the calendar so that they don't get over looked because they look the same. I used the dry erase marker to write down all the events or due dates. I like to color code my events and due dates to make things more organize on my calendar. Any appointments I write in Blue, bill due dates, are in Red, school activities are in Orange, family events or activities or in Pink, and extra curricular activities are in Purple. If you write different events all the same color on the calendar, you might over look an event or due dates because you read another in that same day and over looked it.


On the top left side next to our calendar is where I have our Weekly Menu placed. I created this Weekly Menu template in Microsoft Word and put it in this Dollar Tree picture frame that I painted yellow to go with the color theme. By putting this menu printable in a picture frame it makes it able to use dry erase markers to write on it and then be able to erase it and write on it over and over again for the following weeks. I have a weekly menu in my command center because it lets everyone know what we are having, helps me meal plan in advance, helps the girls know what to pack for lunch the next day, and it also helps me know what meat or item I need to take out for the meal for the next day.


Below our Weekly Menu I have my daughter's Ariana Chores Checklist. I will go more into detail on how I have my daughters complete their chores in another post. I also created this template in Microsoft Word and put it in Dollar Tree picture frame that I painted yellow. 


On the top right side of our calendar is a place where I have so we can write notes to each other or any notes we need to write down. I have a blues dot drawn on there write now because my camera would not take the picture unless it focus on something so I had to draw a dot so it could focus on something lol sorry. I also created this template in Microsoft Word and put it in a Dollar Tree picture frame that I painted yellow as well.


Below where I have the Notes area I have my youngest Briana's Chore Checklist.


Below the calendar I have these boxes that I created out of cereal boxes. I just cut the cereal boxes to the sizes that I wanted, wrapped it in wrapping paper and labeled the boxes with some card stock paper. The reason for these boxes is to keep all the flyers and papers of the activities and events that me and my family go too. I only like to put the dates and times of events or activities that we go to on the calendar and not put too much information on the calendar so I don't overcrowd it, so because of this I like to keep the flyers and papers with all the information about an event or activity close by the calendar in these boxes. The small boxes above the larger ones hold our chore cards. Our chore cards are cards that have chores broken down step by step on what to do with our chores. The cards are laminated so when we complete a task we can use a dry erase marker to check off the task. Once all the the task are completed the cards return back here. I will go more into detail in another post on how I organize how my girls and I do our chores but I like to keep the cards here in our command center so they don't get lost.

So that is our FAMILY COMMAND CENTER. I hope I gave you guys some ideas on how to create one in your home. If you have any ideas on creating a command center please leave a comment down below I would LOVE to read about your ideas. Also check out my youtube channel where I have a video on this FAMILY COMMAND CENTER on there and don't forget to Subscribe for future videos.


XOXO
RIA

Tuesday, March 15, 2016

DIY Dollar Tree Kitchen Decor


Hello Everyone! I am here today to share with you another "DIY Dollar Tree Decor" project that I made for my kitchen. It is so easy and simple to make but really looks great in the kitchen to decorate the kitchen.


First thing I used to create this "Kitchen Decor" was two of the "DIY Dollar Tree Apothecary Jars" I made which are the two pictured above.


To see the post on my "DIY Dollar Tree Apothecary Jars" click HERE 


To fill the jars I used fake lemons and limes that I bought at Wal-Mart for $1 a piece. Dollar Tree does sell fake lemons and limes too but I liked the ones at Wal-Mart better because they are smaller than the ones at Dollar Tree and fit better in the jars.


Here is how the jars look filled up with the fruit. I LOVE the way they look and I can't wait to put them in my kitchen in my new house. I am so ready  to move into my new house so waiting for it to be done being built is hard LOL. I know I need to be patient though because I want my house to be built right. 

I hope you enjoyed this post and found it helpful or got some ideas from it of your own. Please leave me a comment below on some of your favorite ways to decorate the kitchen. I love to read or see other peoples decor ideas.

Don't forget to LIKE, PIN, or SHARE this post if you liked it and found it helpful.

XOXO
RIA


Friday, March 4, 2016

DIY Rotating Supply Organizer


Hello everyone! What can you make with two cake pans, some marbles, paper towel rolls, and some spray paint? You can make this "DIY Rotating Supply Organizer" to organize all your supplies. I made this organizer to organize all of my kiddos' supplies for when they are doing homework or want to create some master pieces. I also made one for myself to organize all my office and craft supplies. What makes this organizer even better is the fact that it rotates so you can easily find all the supplies you need.


To make this organizer be a rotating organizer you will need two cake pans and a bag of marbles. I got the cake pans at Wal-mart for .88 cents each and the marbles at Dollar Tree.


Pour the bag of marbles into one cake pan.


Then place the second cake pan on top of the marbles. The top cake pan can now rotate in circles because it rolls on the marbles. I found this idea of the rotating cake pan on Alejandra.tv's youtube channel. 


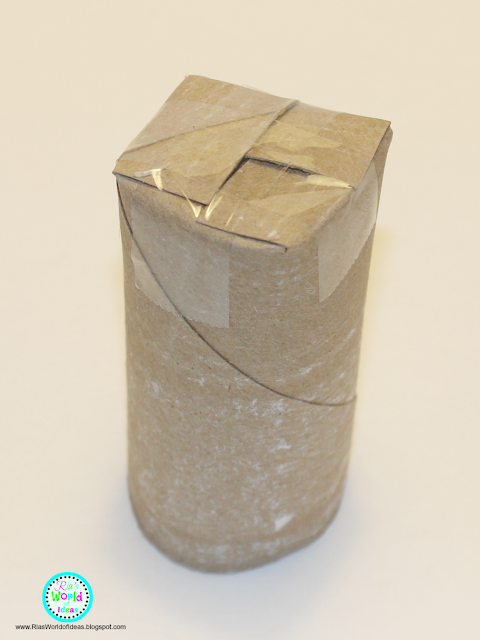
Now to create the different sections to organize the supplies, I just used paper towel and tissue paper rolls.


I cut the paper towel and tissue paper rolls to the different sizes I wanted and then arrange them in the cake pan how I wanted them. Once I arrange them the way I liked them, I staple them together.


After I stapled them together I took the whole toilet paper and tissue paper rolls out of the cake pan and spray paint them a light blue color. Once the paint was dry, I put the rolls back into the cake pan but this time I glued the rolls to the bottom of the cake pan.


The last step was to fill the organizer with all the supplies. I LOVE this organizer and you can use it for so many things and in so many rooms. With it being a rotating organizer, it can be put in the middle of a table or on a shelf and you can still get to whatever supply you need. Also this organizer was so cheap to make as well.

I hope you liked this post. Please let me know in the comments below some of your favorite ways to organize your supplies.

Also don't forget to LIKE, PIN, or SHARE this post if you like it and found it helpful.

XOXO
RIA


Friday, February 26, 2016

DIY Dollar Tree Candle Decor


Hi everyone! I am back to share with you another "DIY Dollar Tree Project Idea". I know I have been doing a lot of Dollar Tree DIY and I never mentioned why. Well my husband and I are having our FIRST and ONLY house built and it will be our FOREVER HOME for us and our girls. So all of these DIY things I have been creating is for our new home. The one project that I will be sharing with you today is a "Candle Decor" project that I plan to put on the edges of our garden tub in the bathroom. But this "DIY Dollar Tree Candle Decor" can be use in other parts of the home and still look beautiful.


This is the vase that I found at Dollar Tree that I used for this project.


I also got this candle stick at Dollar Tree to make the Candle Decor taller.


To glue the candle stick and the vase together I used the E6000 glue. This glue (like I have said before) works great on glass projects.


This is how it look once I glued the vase and candle sticks together.


I wanted to add some color to this "Candle Decor" and also give the candle some height in the vase so I use these blue glass gems that I also got at Dollar Tree.


I put a toilet paper roll in the middle of the vase when I was putting the glass gems in so that I wouldn't need so many glass gems to get the height I wanted for the candle. (Sorry the picture was so dark, it was hard for me to get a good picture without a flash glare).


I then cut four slits in the toilet paper roll down to where the glass gems end so that I could fold it and tape it down.


I then took the toilet paper roll out and taped down the slits.


I then returned it back to the vase with the glass gems around it.


These are the candles that I used for this project and I also found them at Dollar Tree. I was going to use some taller candles I saw at Wal-Mart but I didn't like the look of how tall they were so I used these which was even better because these were just a dollar each and the ones at Wal-Mart were $3 each.


This is how they look. I can't wait to see how these will look in my bathroom on the garden tub. When I move into my house I will be having blog post on how I decorated and organize my house so stay tuned for those future post.

I hope you enjoyed this post.

Don't forget to LIKE, PIN, or SHARE this post if like it or found it helpful.

XOXO
RIA


Wednesday, February 17, 2016

DIY Dollar Tree Make up Brush Organizers


Hi everyone! I have another DIY Dollar Tree Organization project to show you guys today and it also has a little "Glam" added to it just like my "DIY Glam Dollar Tree Organization Decor" project that I did and posted before.


To see this post click here


When I was making my "DIY Dollar Tree Apothecary Jars" I used the lid of this jar that I got from Dollar Tree to use for the lids of my Apothecary Jars. The lid on this jar fit perfectly on the vases that I used to make the Apothecary Jars. Of course I was not going to let the jar without the lid go to wasted so I had some ideas in mind for them. One of the ideas was to use the open jars for my make up brushes. 


To see this post click here


I wanted to add some "Glam" to these make up brush organizers. I used the same diamond wrap ribbon on them that I used on my "Glam Organizer Decor".


I used the E6000 glue to glue the diamond wrap onto the jars. Now I have make up brush organizers to match my other "Glam" organizer Apothecary Jars. 


Another idea for using these jars without their lids is by making a Flower arrangement with things from Dollar Tree as well. I made this arrangement for my sister because she likes red.

I hope you enjoyed this post. Let me know in the comments below some ways that you like to organize your make up brushes or any other ideas you might have for these jars without their lids.

Don't forget to LIKE, PIN, or, SHARE this post if you like it and found it helpful.

XOXO
RIA


Sunday, February 14, 2016

DIY Glam Dollar Tree Organization Decor


Hello everyone! So earlier this month I shared with you guys a post on how I made Apothecary Jars out of Dollar Tree items.


To see this post click here.

Today I am going to share with you how I filled some of these jars I made for my "Glam Organization Decor".


These are the three Apothecary Jars that I made that I used for this project.


I found these pretty Glam looking ribbons at Dollar Tree and knew that they would look so pretty on the Jars.


I wanted each Jar to have different number of rows of sparkling ribbon so that they could be a little different from each other. So I cut the ribbon to make two rows and one row. For one of them I was going keep the the ribbon as it was with three rows but for the other two I would have two or one row of sparkle ribbon. 


I wanted to add a special touch to each middle of the ribbon on the Jars. I could not find any jewels or gems I liked at Dollar Tree, Hobby Lobby, or Michael's. Then I was at Wal-mart and saw these earrings and thought these would look beautiful on the jars.


I used these small Jewelry pliers to take off the hook on the earrings.


I used the smaller pliers to bend the back of the bigger earring to make a loop to loop onto the ribbon.


To glue all these things to the Jars I used E6000 glue which is great for glass projects. This glue also dries clear.

For the tall jar I glued the ribbon as it was and a diamond in the middle. For the second jar I liked the look of one row of  ribbon and the tangling diamonds on it. For the small jar I used two rows of sparkling ribbon and one diamond on it. I also put some sparkling ribbon on the lids as well.


After I finished decorating the jars I then filled them up with things I found at Dollar Tree, which were cotton balls, bath salts, and Q-tips. 


 I also made a green set of Apothecary Jars for my mom.


I filled her Jars with the same contents as well. 

 My mom and I put these jars in our bathrooms and not only do they function to ORGANIZE some of our bathroom contents but it also becomes bathroom DECOR because they look so pretty.

I hope you enjoyed this post. Don't forget to LIKE, PIN, or SHARE this post if you like it and found it helpful.

Also stay tune for future post were I will be sharing more ideas on how I used these Apothecary Jars in other parts of my house.

XOXO
RIA