

Every women ( I think ) should have a place in their house where they can sit and get pretty or glamorous! Even if you are just doing your hair. Before I was just getting ready in the bathroom like most women do but I was getting tired of having to stand and lean over the mirror do my make up and hair. Putting a chair in the bathroom was not an option because one there was no room and two the cabinets would always get in the way of me getting close to the mirror. I was looking for something different where I could sit and get ready.
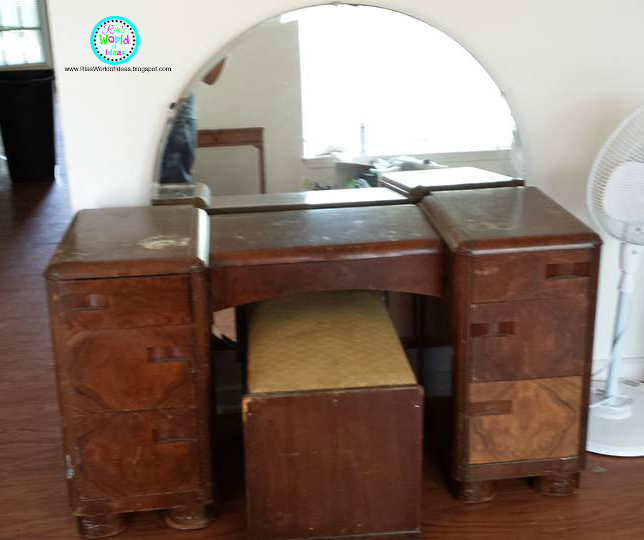
When I saw this Vintage Vanity at a Garage Sale I saw potential in it to created something I wanted so I got it.

This is a close up of just the desk piece.

The first thing I did was remove all the drawers and paint the desk part a dark brown.

Some people make have liked to keep the old finish on it but as you can see the desk part had some scratches and stains on it so by painting all of it a new color I could cover all the imperfections up.

This is what it looks like when it was all done being painted. I painted two coats on it and I waiting a whole day before I put the next coat on because I wanted the paint to stick.

Now it was on to the drawers. I didn't like the handle part that it had where it was carved into the drawer.


So I got some Wood Filler to fill in those carved out drawer handles.

I let the Wood Filler dry for a whole day and the next day I sanded it down to make it even with the drawer fronts.

Now it was time to make the holes for the drawers. Here is a TIP on how to make sure you drill your holes the right measurements apart. Put some painters tape onto the handles you are going to use and poke holes where the screws would go in.

Then poke a hole exactly in the middle of those two holes.

Then measure out and find the middle of the drawer and mark it. Then place the middle hole on the tape on that spot you just mark on your drawer. Make a mark with a pencil where the two screw holes should go and remove the tape.

Use a drill to create the hole you need for the draw handles.

Now it is time to dress up the drawers and make them nicer. For this next step you will need fabric, mod podge, and foam brushes.

Put an even layer of mod podge onto the fronts and sides of the fronts of the drawers.

When cutting your fabric to go onto you the drawers make sure you cut it a inch or a inch and half longer on all sides so you have enough fabric for the sides. Place the fabric onto the drawer and you have a little time to adjust the fabric how you want it. Then once you have it like you want it take a DRY foam brush and smooth out the fabric of any bubble or wrinkles. Then apply another coat of mod podge on top of the fabric and down the fronts sides of the drawers.

Use an exacto knife to trim up the edges and to poke holes through the fabric where the handles will go.

These are the handles I bought for the Vanity. For the top two small drawers I used the small knobs and the rest of the drawers got the longer ones.

Attach your handle.

Now it is time to make the border on the drawers. Because the drawers where stacked on top of each other I wanted to make a border to created a separation between the drawers. I wanted to add a little sparkle to it so I choose to use sequins.

Here is a TIP when you are working with sequins use a white make up pencils to grab the sequins and place it where you want it to go. This is just a wet and wild one and the sequins sticks to the pencils and make it easier to place it where you want.

I covered the whole border with sequins. ( You may see some brown spots on this picture through the fabric but that because the fabric is still wet, once it dries it will all look even)

Now onto the mirror. This is how it looked before.

This mirror had a crack in the top border and I wanted to cover it up.

I got these Blue gems at Dollar Tree and thought these would be pretty as a border around the mirror and cover up the crack.

I just used a hot glue gun and glued the gems all around the border of the mirror.

This is the finished Vanity!!

Here is a close up of the middle drawer. Sorry the picture is dark.

Here is the close up of the side drawers.

This is what the bench look like before.

I took it apart and painted the wood frame brown.

I cut out the old fabric and foam from the cushioning seat.

I saw that there were cracks in the wood and since I knew I was going to cover up the wood and just decided to use good ole duck tape to fix it .

To make a new seat I needed batting and spray glue.

I took some batting folded it four time and sprayed the wood with the spray glue stuck the batting onto the wood.

Then I cut two layers of batting a little bit longer then the seat and laid it over the seat.

Then I flipped the the seat over and attached the batting to the back of the seat with a staple gun.

I cut the fabric that I used for the drawers just like I cut the top two layer of batting and laid it over the batting flip the seat over and attached the fabric on the back side of the seat with a staple gun.
That is it!! I LOVED the way this Vanity came out and it is going into my walk in closet and is another part of my Closet Organization that I am working on right now so stay tune for more of that.
Please don't forget to like and share this post if you enjoyed it.


