Wednesday, July 30, 2014

DIY Plastic Bag Organizer


Hi everyone I wanted to share this cool organization idea that I found on Pinterest. I can't remember what blog page I found it on but for whoever came up with this idea is creative.

 I don't know about you but I reuse my plastic bags for everything and before I used to just store a bunch of them in one plastic bag but that takes up a lot of space and looks ugly so when I saw this idea I could not wait to do it because it gets all your bags organized and takes up less space.


First you need to flatten out about 12-15 plastic bags and get all the air out.


Then fold the bag in half.


Then start layering the bags on top of each other.


You will have a long line of bags like this when you are done layering.


Then go to the first bag and fold down the flap.


 Now start rolling up the bag keeping that flap that you just folded down sticking out. Roll it tight together.


Once you have rolled up all the bags it will look like this.


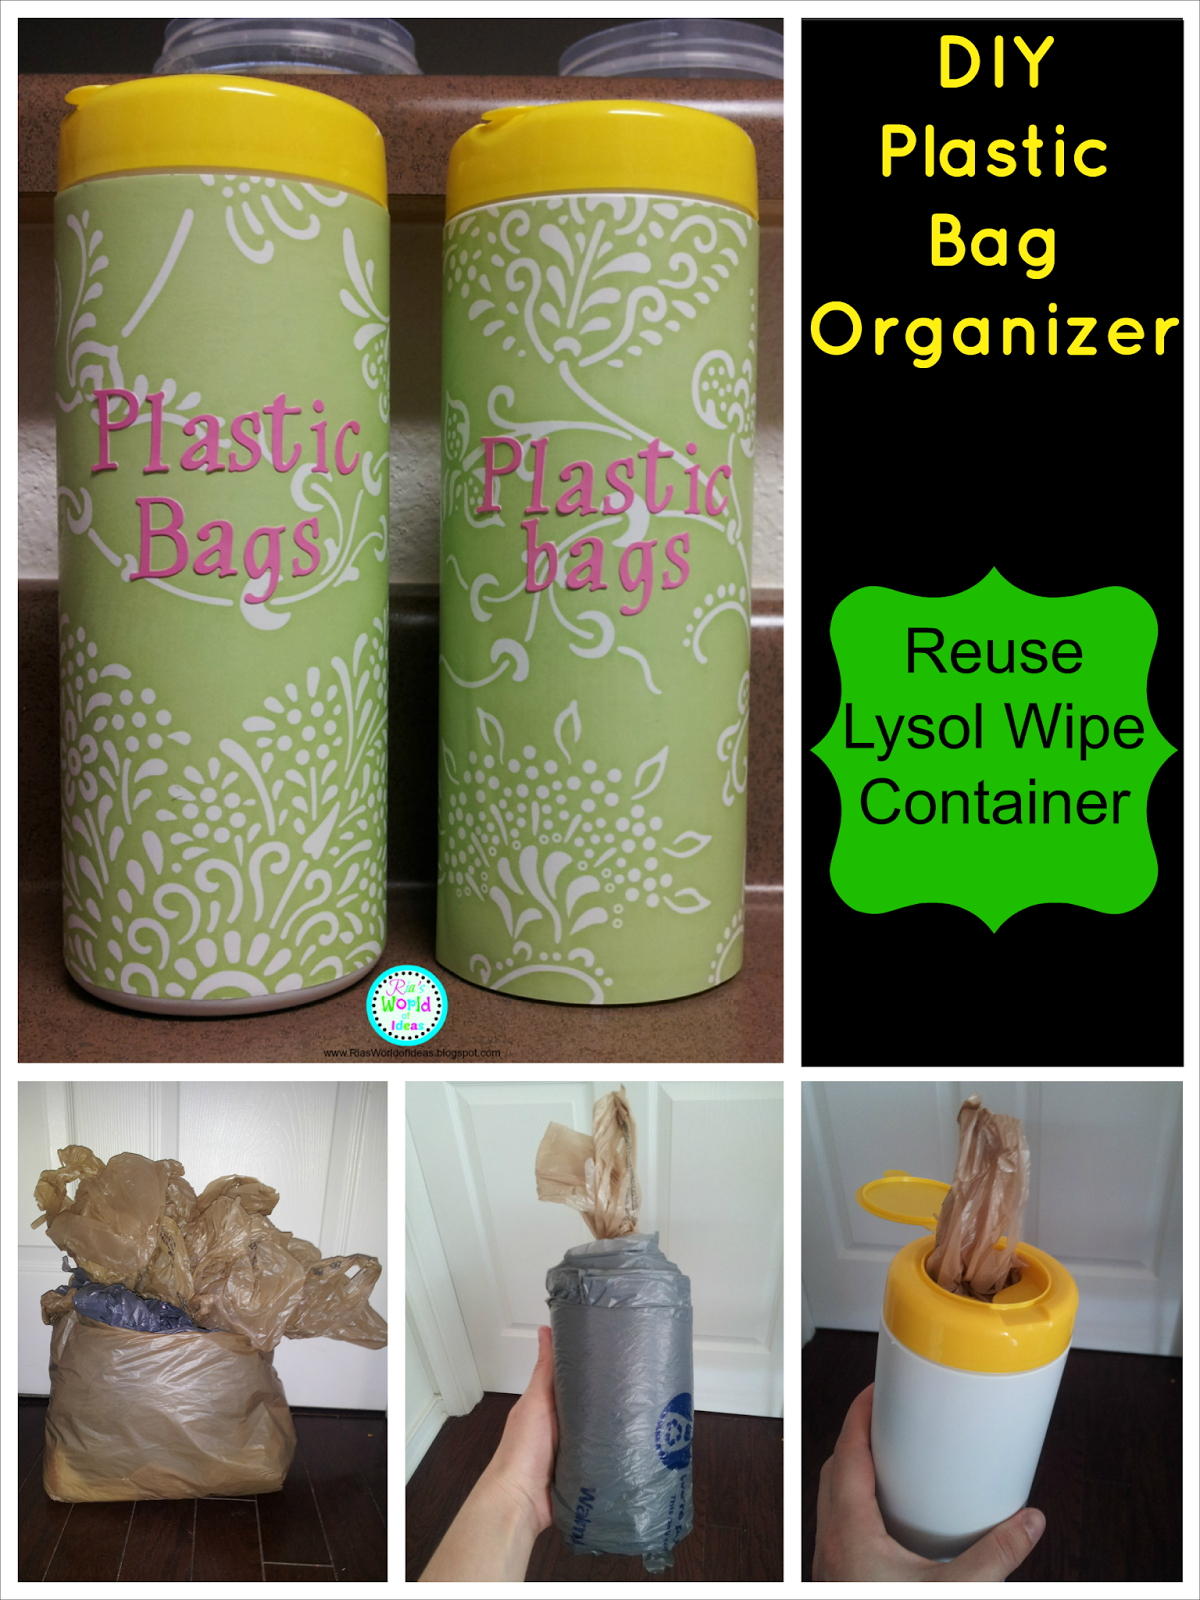
Then put the bags into a empty and clean Lysol or Clorox wipes container.


Stick the flap threw the hole of the lid. When you need a bag pull that flap and the bag will come out and replace it with another bags flap.


Now you could leave the container how it is but I wanted to make it look pretty so I just covered the container with decorative contact paper.


And of course because I LOVE to label everything I had to label these containers.

These containers can hold 12-15 bags and take up less space then the way I had them before. I keep one in the car and put one under each sink in the house.

Hope you enjoyed this post don't forget to PIN or LIKE this post! 

Also please leave me comments on ways that you like to organize I love sharing ideas with people! :-)


Wednesday, July 2, 2014

4th of July Ice Painting


I found this cute idea for 4th of July Ice Painting on http://mamaslittlemuse.blogspot.com/2012/06/patriotic-ice-cube-painting.html and the great thing was everything she used for this project I already had at home so I didn't need to go out and buy anything.


All you have to do is fill a Star ice cube tray (I found mine at Dollar Tree) with red, white, and blue tempera paint. Then cover the tray with plastic wrap and stick toothpicks in the middle of the stars with paint. Then put them in the freezer to freeze overnight.


Once they are frozen they pop out easy  from the tray. (The tray I got was a rubber tray which helps with taking the frozen paint out)


I gave both my girls one of each color and also color paper to paint on.


The paint went on the paper so smooth and because it was frozen it gave the paintings an old fashion oil painting effect which was pretty.

The girls enjoyed this because it was a different way to paint and also because since it was Summer and hot the ice painting was melting as they went to create different kind of drawings. My oldest ask if she could mix the colors to create new colors once the paint was melting and I said yes and she taught her little sister what two colors make up another color. Also once the paint melted and didn't stay on the stick anymore my oldest said we can just finger paint and use our fingers to make the drawings.  I loved that because this project started out painting one way but my oldest not only turn it into a learning colors lesson but also adapted new ways to use the paint once it melted. This was a GREAT sensory project that was fun and also become a learning activity!
Thank you for the idea http://mamaslittlemuse.blogspot.com/

If you enjoyed this post please don't forget to like or pin it!!


4th of July Dipped Strawberries & Rocket Dog


I am having some fun with food this week with my little girls since the 4th of July is on Friday. Monday night we decide to have a 4th of July theme dinner with Dipped strawberries and Rocket Dogs. Of course I found both these great ideas on Pinterest!! I love pinterest!!


For the Rocket dogs first you need to stick the skewers through the hot dog.


Then take any dough (I used biscuits dough) and roll it into a long line.


Then wrapped the dough around the hot dog and bake.


Then once the hot dogs are done baking let them cool and stick a piece of white cheese (that is cut like a triangle) at the tip of the skewer. Then tie some ribbon on the bottom of the skewer and you have your Rocket Dog! For the strawberries just dip them in white melted chocolate and then blue sprinkles. Put them in the fridge to harden the chocolate.

The girls loved this special 4th of July dinner and thought is was so cool!

Please pin or like this post if you enjoy it!